Installing unattended access on a remote computer
Unattended access will allow you to connect to remote servers, access your home/office machine(s), and connect to computers when nobody is working on them.
Each FixMe.IT seat allows installing up to 200 unattended computers.
There are two options for installing unattended access on a remote computer:
Option 1 (In-Session)
- Connect to a remote computer.
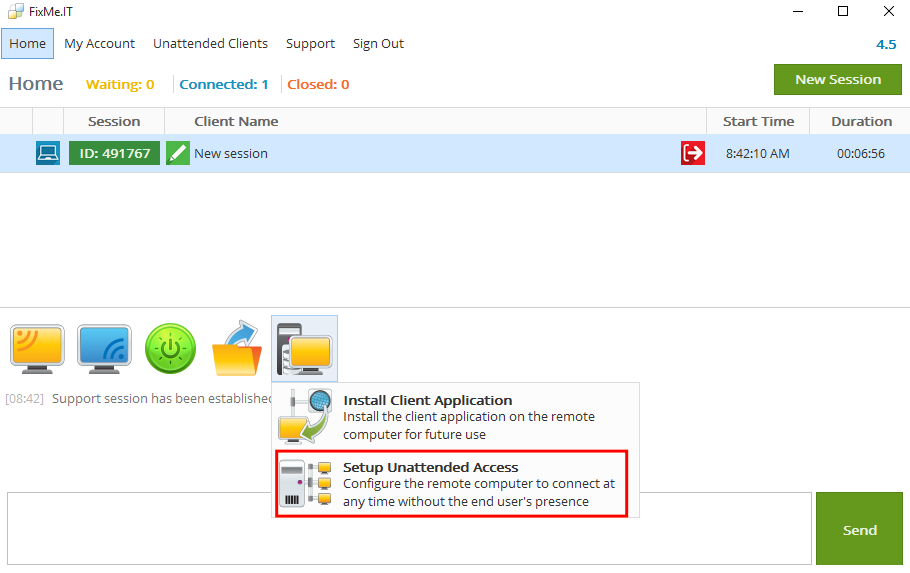
Click the Install button and then click the Setup Unattended Access menu item.
The Setup Unattended Access menu item is available when the Client application is running as a Windows system service (with elevated privileges).
If the Client application is running as a limited application, you first need to restart the Client application as a Windows system service .
- Enter the Computer Name, optionally provide a Computer Group for this computer and click Setup in the displayed dialog.
- If you don't have Windows credentials for this computer, you can request the remote user to provide these credentials using the Request the Client's Windows login credentials checkbox. This will allow you to connect to the computer and automatically log into Windows using the stored credentials
The Windows credentials are stored in a safe storage on the remote computer, and are not transferred anywhere.
The Setup Unattended Access prompt will appear on the remote computer. The remote user must respond to this prompt. After unattended access has been successfully installed on this computer, the computer will be added to your Unattended Client list and a FixMe.IT unattended access icon will appear in the remote computer's system tray. You can now connect to this computer at any time.
Option 2 (Using the setup file)
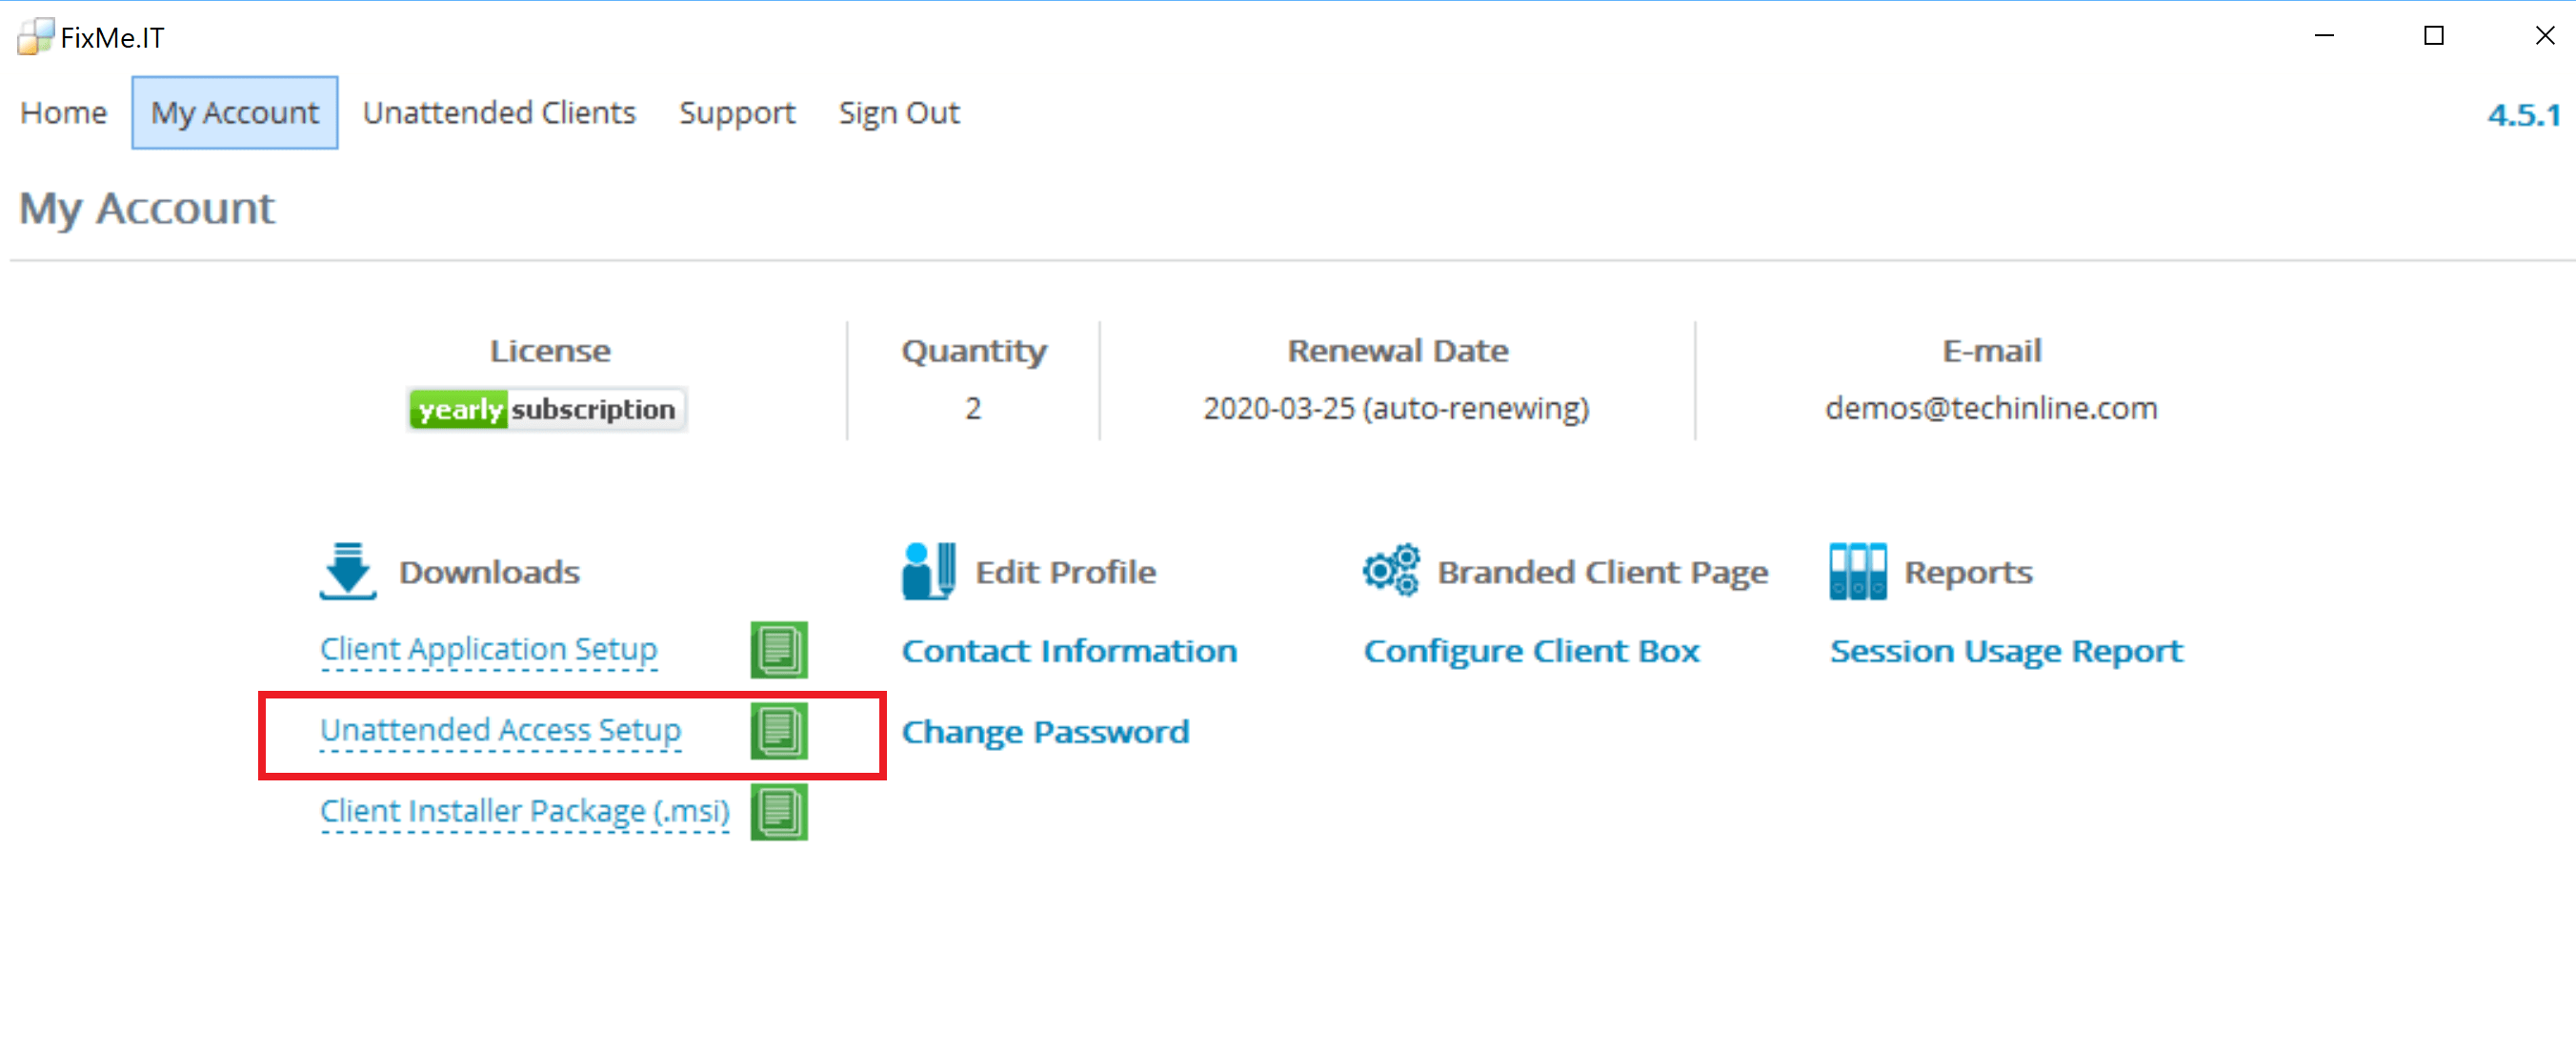
- Run the Expert application.
- Go to My Account tab
- In the Downloads section, click the Unattended Access Setup to download it, or click the green icon to copy the link to clipboard.
- Run the downloaded file on the computer that you want to setup for unattended access. After unattended access has been successfully installed on this computer, the computer will be added to your Unattended Client list and a FixMe.IT unattended access icon will appear in the computer's system tray. The unattended computer will be given a default Computer Name and empty Computer Group name. This information can be changed in your Unattended Client list.
You can now connect to this computer at any time.
If you would like to install unattended access on multiple computers using Group Policy, use instructions provided in Mass Installing Unattended Access.